How to Start a Neighborhood Tool-Sharing Group in a Rural Town
October 10, 2026 - Community


October 03, 2026 - Countryside
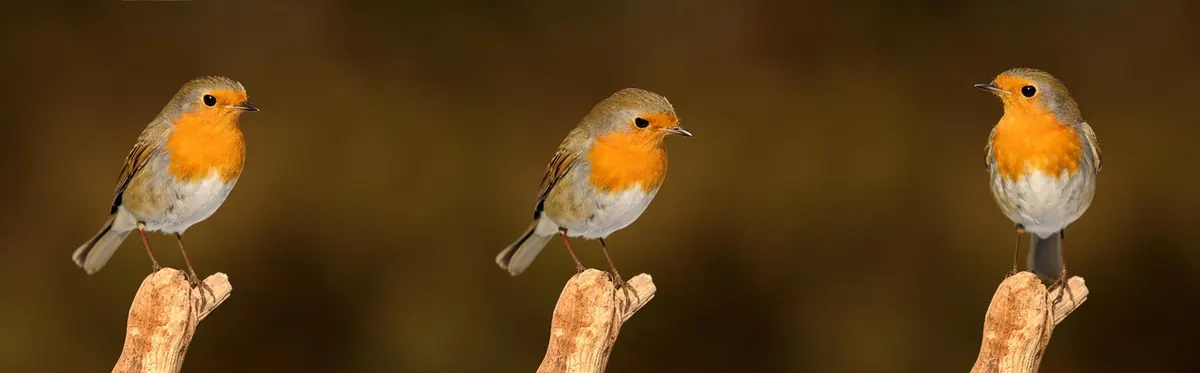
The first time you plant a garden without digging, it feels like skipping a step. You stand over a patch of ground with a trowel in your hand, and something in you wants to turn it all over, break up the clods, get things "ready." Resist that urge. No-till gardening asks you to trust that the soil already has a workforce — worms, fungi, bacteria, beetles — and that your job is to feed them and stay out of their way.
It works in backyard beds, raised beds, and a strip of lawn you've decided to convert. Here's how to start, what to put on top, and how to plant into ground you never disturb.
No-till means no rototilling, no spade-turning, no double digging. Instead of mixing organic matter into the soil, you lay it on the surface and let soil life pull it down. It sounds passive. It is not the same as doing nothing.
When you till, you do three things at once: you shatter the aggregates that give soil its structure, you slice through the fungal threads that move water and nutrients between plants, and you drag long-buried weed seeds into the light where they germinate. Frequent tillage also burns organic matter fast, because exposed carbon oxidizes and washes away. That's why a bed rototilled every spring often needs more water and more fertilizer than it did a decade ago.
Be patient with the first season. On heavy clay, an untilled bed can be slow to warm and slow to drain until soil life rebuilds structure. By the third year, most gardeners find the soil darker, crumbly, and full of worms where there used to be hardpan.
Six to eight hours of sun for most vegetables, a spot within reach of a hose, and ground that doesn't stay flooded in spring. If the only open spot is lawn, that's fine — lawn is just a cover crop you didn't plant.
For lawn, give it six to eight weeks before planting. Tough perennials such as bindweed, quackgrass, or creeping thistle need longer, and you may have to dig those out by hand first. No-till is not a promise that you'll never touch a shovel.
Keep beds narrow — four feet is a good standard. You can reach the middle from either side without stepping on the soil, which is the whole point: uncompacted ground stays loose. Put wood chips or straw on the paths, where walking is expected.
Mulch suppresses weeds, holds moisture, keeps soil temperature steadier, and feeds the soil as it breaks down. What you choose matters less than having something there.
Two inches is enough for most beds; three or four is better where weeds are aggressive. Whatever you use, keep it a hand's width away from stems and trunks so air can circulate.
For transplants — tomatoes, peppers, kale, most of what you'll bring home from a nursery — pull the mulch back, make a hole in the compost layer with a trowel or dibble, set the plant in, firm the soil around the roots, and push the mulch back to within an inch or two of the stem. Water it in.
For seeds, sow directly into the compost layer and keep it evenly moist until germination. Fine seed like carrots and lettuce wants a finer surface, so sift compost through a screen or colander over the row and press it down gently. In heavy clay, carrots and parsnips may fork or stay short the first year; grow them in a trench filled with screened compost, or give them a raised bed while you build soil elsewhere.
Some crops barely need planting at all. Potatoes can be laid on the surface and covered with a foot of straw or shredded leaves — keep adding mulch as the vines grow, then harvest by pulling the nest apart. Garlic goes in during fall, planted a few inches deep, then mulched heavily with straw for winter.
Water less often and more deeply. Mulch slows evaporation, so the surface may look dry while the root zone is fine. Push a finger or a trowel down a few inches before you reach for the hose.
Annual weeds in a no-till bed pull out with almost no effort, because the soil beneath them is loose and undisturbed. Perennials need persistence: cut them at the soil line every week or two rather than yanking, which breaks roots and multiplies the plant. A sharp hoe worked just under the mulch handles most of it.
To feed the bed, topdress with an inch or two of compost each fall or spring and let the worms do the incorporating. If you want to know whether your soil needs anything specific, a soil test through your local extension office or a lab tells you far more than guessing.
One bed, four by eight feet, is plenty for a first year. Plant things you actually eat, mulch them well, and spend the season watching instead of digging. Autumn is a good time to smother next year's bed: cardboard, compost, mulch, done.
Keep a few notes — what you planted, when, how the mulch held up, where the weeds came from. By the second or third season you'll notice the soil has changed without any help from a tiller: darker, softer, easier to push a trowel into. That's the payoff, and it keeps compounding as long as you keep the ground covered and your spade in the shed.
Photo: susannp4 / Pixabay
A practical guide to starting a rural tool-lending library: how to survey interest, choose a structure, build a...
Woven wire, electric, barbed, and portable fencing each suit different animals and budgets. Here's how to choose for...
Copyright © 2026 Humble Vale. All Right Reserved.